Vehicles
PermaLink Nellie Caravan - Ezytrail Ceduna 13 Mk123/12/2023 01:00 PM
Image:WeaselSnout - Nellie Caravan - Ezytrail Ceduna 13 Mk1


Nellie Caravan - 2019 Ezytrail Ceduna 13 Mk1

Photos of upgrades, modifications and repairs

See the Pictures Here

(0)

PermaLink Alice - 2012 Range Rover23/03/2023
Image:WeaselSnout - Alice - 2012 Range Rover


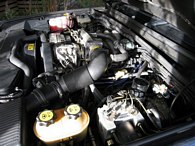
Alice - 2012 Range Rover Vogue, Luxury with 4.4 Turbo Diesel V8

Repairs, upgrades and modifications

See the Pictures Here


(0)

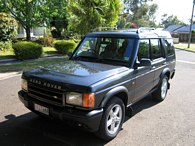
PermaLink Sally - 1999 Land Rover Discovery ES27/11/2022
Image:WeaselSnout - Sally - 1999 Land Rover Discovery ES


Sally - 1999 Land Rover Discovery ES, 7 seater, 4.0 V8

Repairs, upgrades and modifications

See the Pictures Here


(0)

PermaLink Toby - 1977 Land Rover S3 GAME03/01/2020
Image:WeaselSnout - Toby - 1977 Land Rover S3 GAME

Toby - 1977 Land Rover Series 3, SWB, Game #205

Full nut and bolt restoration, 200tdi engine conversion and power steering.

See the Pictures Here


(0)

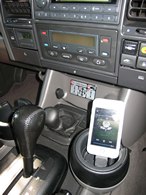
PermaLink Discovery 2 wired Aux/Mp3 audio input28/04/2010 01:18 PM


Discovery 2 wired Aux/Mp3 audio input.

See the Pictures Here


The issue for me has been how to connect an Mp3 player to the Disco Stereo.

I tried the FM transmitters but the dynamic range was poor and the constant retuning for a clear frequency drove me insane.

I tried the tape adaptor which was better but sound quality was still dodgy, I'm not sure if its just a crap tape deck or if my heads are dodgy and I presume because its not grounded the mobile phone cased interference.

The solution I have had in my mind for sometime was to use the CD inputs as the Mp3 input, but I searched the Internet for someone who had done this before but i came up blank. I did find a few adaptors available but all were $$$$.

The stumbling block for this project has been trying to find the CD audio wires, I searched the electrical diagrams on the RAVE CD and couldn’t make head not tail of them and then by pure chance looking for something else I found the pin outs of the connectors on the stereo.

There are a few limitations with this install
It can only be used if you have the CD stacker installed, if you don’t have the CD stacker then you cannot select “CD” as an input on the head unit.

It isn’t a separate input, it just uses the CD audio input and the head unit thinks its playing a CD and will continue going through playing the CD’s in the stacker.

3x different scenarios for doing this
1. Disconnect the CD audio inputs and wire directly to MP3.
2. Wire a switch ( 4 Pole Double Throw) to select input from CD and MP3
3. Or use a switched head phone socket that will switch to the Mp3 when the plug is inserted.

I used the 3rd option but now I think I should have taken the 2nd option?


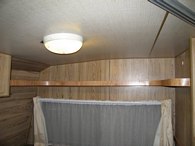
PermaLink Caravan hinged shelf, stretcher bunk bed, sink lighting and sink splash back. 18/10/2009 09:06 PM


More caravan work, hinged shelf, stretcher bunk bed and sink splash back.

See the Pictures Here

Continuing on with more updates on the caravan from the last instalment which was where I
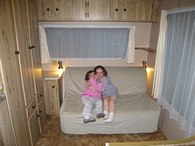
replaced the lino and installed a sofa bed. Now that the sofa bed was in I wanted to create a table to use when the sofa bed was in the couch position and that could be folded flat when it was in the bed position.

I still had ply left over from when we created the
shelves for the caravan and it didn't take long to have something whipped up and a coat of clear coat on it. I found there was a stud running across horizontally along the half partition wall to secure the shelf to and just used a piano style hinge along the length of the shelf.

Where I did run into trouble was trying to find a solution to secure it in the folded out position, my intention was to use the metal hinged style brackets that they use on things like card tables and picnic table legs to hold them in place. I found something similar at Bunnings but when I came to use them found that due to the design they didn't fold flat or worse didn't allow the table to fully extend out.

I messed around modifying them by drilling out the rivets at the hinged points, cutting them down so each half was at equal lengths and riveting them again. This solved the extension and folding flat issue but after finally getting them sorted a new issue arose where they were to weak to reliably hold the shelf out. After 3 hours of mucking around with these supports I gave up and binned them and instead I just used the simple option a wooden support, which is hinged up from the floor.

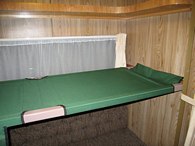
One of the major projects that I needed to do was to add an extra bed into the van, with Malcolm using the caravan at Xmas he requires an extra berth to sleep his 3 kids. This has posed quite a dilemma for me, I didn't want to create a permanent fixture so it needed to be removable, Malcolm had suggested a stretcher bed type arrangement, as this is what the caravan he used whilst in Denmark had.

I looked at getting a piece of canvas sewn up but the cost was prohibitive, I looked at camp stretcher beds but once again they were too expensive, but as luck should have it Aldi came to the rescue with a stretcher bed for $40 in one of there weekly specials.

Armed with an Aldi stretcher bed I was pleased to find that I could unbolt the centre section to remove the canvas (its actually PVC & polyester) and this also allows the canvas to be put back on if we ever require a camp stretcher.

I needed to figure out the construction, I have probably over engineered it but the thought of it collapsing worried me greatly. As the stretcher poles span from side to side and are unsupported in the middle I needed something that would not deform and possibly pop out of each end. I had 2x pieces of 50x50 box tube left over from when we
made the rear bumper, they weight an absolute ton and make it awkward to put the stretcher bed in and out of place but at least I don't need to worry about there strength.


(2)

PermaLink Caravan wall, floor repairs and sofa bed.09/10/2009 11:06 AM


Repairing the walls, replacing the lino and installing a sofa bed.

See the Pictures Here

The latest installment of caravan works, with a couple more things completed and a couple more projects still left to do before we head off to Marlo after Xmas.

Although, the
bumper we made back in March this year was a success the bike mounting was a bit of a disaster. The issue is that the suspension on the caravan is taken from the days of horse and carts, with dual live axles connected via leaf springs and no dampers. This might be fine for something travelling at 15km/h but travelling at 110km/h it does tend to lead to everything being shaken to pieces.

The bike rack with the bikes on it bounced its way down the highway and gained enough momentum to flex the bike rack and the bumper as well which lead it to keep bashing into the rear of the van. The rear of the van isn’t very solid and this constant pounding caused flexing in the rear wall which in turn caused the
repairs that I did inside in 2007 to crack.

So my solution has been to place a piece of 50mm angle iron across the rear of the caravan to not only strengthen it, but to give a fixing point for the top of the bike rack and to cover the dent that was caused. Although this is a less than attractive repair especially considering its painted black, I hope that it provides a solid enough solution.

To repair the inside wall I cut back the damage and bogged it back up with car filler, when choosing the car filler I noticed one that was supposedly “flexible” what I soon learnt was this actually meant “it never actually dries properly so is a damn bugger to sand without the sand paper clogging!”


(0)

PermaLink LPG install into Sally 28/06/2009 05:10 AM
 

LPG install into "Sally" the Land Rover Discovery 2.

See the Pictures Here

Sally converted to run on LPG, using an Italian made vapour sequential injection system made by Tartarini and fitted by Range-Rov Automotive in Vermont.

There are 2x tanks that replace the original 90 litre fuel tank and give a useable 80 litres of LPG and a smaller 50 litre petrol tank is installed in the RHS wheel arch. With this setup it should provide 350KMs on LPG and 250kms on Petrol


(0)

PermaLink Restoring Scotts old Shogun Katana for Jamie01/05/2009 08:25 PM


Restoring Scotts old Shogun Katana for Jamie

See the Pictures Here

Restoration of Scott's old bike that he kindly gave to me to pass onto Jamie.

A complete restoration with every nut and bolt removed cleaned, polished and then reassembled. It has so far taken 3 full days and in which time it is almost completed with probably another half day to finish everything off.


(0)

PermaLink Caravan Shelves 28/03/2009 09:35 AM


More caravan work, making additional shelves for the caravan.

See the Pictures Here

Although the caravan has plenty of storage, the majority is located under the seats making it tricky to find a home for everyday items.

So i decided to make 4 additional shelves for the caravan:

1. A small shelf beside the bed, so that there is somewhere to put a book, drink, clock etc
2. A medium size shelf above the bench top on the other side of the bed
3. A very small shelf in the kitchen to put coffee, sauces or herbs
4. A large shelf above the couches where the girls sleep to put their toys, pillows and blankets.

David came through with the ply to make them out of and also edged 2 of the shelves with American Oak veneer which has come up a treat.


(0)

PermaLink Caravan Works09/03/2009 07:26 PM
Image:WeaselSnout - Caravan Works

Caravan rear bumper with bike rack mounting point.

Making a rear bumper for Dad's Caravan to mount the bike rack onto and to offer some protection has been a plan on the cards since i first used the caravan 2 years ago.

After picking up the caravan from storage in Portarlington and on our way home we made a detour to Cath's Dads to have a rummage around his back-yard for some steel. We found a nice looking piece of 100x50 from a pallet packing shelf for the bumper itself, some 75x75 angle and some 50x50 box tube to form the bumper mounts.

With the steel in hand i came up with a rough plan which David dropped over to have a look and confirmed that it would be okay. From here i came up with the final design and cut the steel to suit ready for David to weld for me.

Taking the caravan over to David's we spent the day welding up the bumper bar and putting the spare wheel carrier on... with David doing all the welding :) .

A quick coat of black kill-rust applied with a brush and it looks like its always been there.


See the Pictures Here


 Image:WeaselSnout - Caravan Works

Caravan Exterior Clean.

This is something I have been wanting to do for the last couple of years and have been slowly making progress with the exterior the last few times I have had the caravan at home.

The paint is so thin and chalky on the caravan now that if you scrub a little to hard you go back to the aluminum underneath and with the paint so porous it stains with every bit of dirt that comes in contact with it.

This time I scrubbed the van clean and gave it a wax, what a difference it made and I never realised that the paint is actually cream and beige, as its always been flat chalky white in colour.


See the Pictures Here


 Image:WeaselSnout - Caravan Works

January 2007 - Dad's Caravan before i started work on it
.

The caravan has been sitting for 2 years, so after checking the brakes and with 4 new tyres that Dad kindly paid for, I dragged it back from storage in Ballarat.

As the drain holes in the windows had filled with moss the rain was unable to drain from the windows and had been over flowing into the caravan itself.

Having only 3 days for maintenace and packing before it became our home for
10 days in Robe SA we set to work cutting the rot out of the plywood and cleaning everything up before heading off.

See the Pictures Here

(0)

PermaLink Car Stuff22/04/2008 12:58 AM
Image:WeaselSnout - Car Stuff

See the Pictures Here

May 2008 - I beefed up the standard Discovery 2 recovery point

A block has been welded in place between each side of the hook and the u channel below the bolts has been braced with a horizontal support.


Image:WeaselSnout - Car Stuff

See the Pictures Here

April 2008 - Home-made CDL Lever

A quick and dirty home made Centre Diff Lock lever made from what ever i had laying about.


Image:WeaselSnout - Car Stuff

See the Pictures Here

April 2008 - Rewire of the Calibra's Headlights

Due to the terrible headlights in the Calibra i rewired them to use relays in an attempt to improve things buy avoiding the small gauge wire running to the lights.


(0)

PermaLink Tonka Sall31/10/2006 12:19 PM


Tonka Sall

See the Photos Here

Well we've just bought our very first Land Rover, its a 2000 Discovery ES Series 2, 4ltr V8, 7 seater, with ACE, 18" wheeels and optioned up Harman Kardon Stereo.

She is known by the family as Tonka Sall, the Tonka part is obvious but the Sall part is a little obscure. After filling in the VIN # on the finance paper work, transfer papers etc i started calling her Sall as this is the begining of the VIN number


She is a seriously well sorted bit of kit!

Some of the cool features & specs in no particular order:
  • Harmon Kardon 12 Speaker Stereo, CD Stacker - 6 disc (located under the drivers seat)
  • 18" Alloy Wheels
  • ABS (Antilock Brakes), EBD (Electronic Brake force Distribution), Calipers - Front & Rear 4 Spot, Disc Brakes Front Ventilated Rear Solid
  • Air Cond. - Climate Control 2 Zone, Air Conditioning - Rear 2nd & 3rd Row Seats
  • Airbags - Driver & Passenger (Dual)
  • Central Locking - Remote/Keyless, Engine Immobiliser
  • Centre Differential, Control - Traction
  • Cruise Control
  • Electric Seats - Front, Leather Trim 7 Seats
  • Fog Lamps
  • Front, Headlamp Washers
  • Headrests - Integrated 2nd & 3rd Row
  • Power Door Mirrors - Heated
  • Power Windows - Front & Rear
  • Rear View Mirror - Electric Anti Glare, with Compass
  • Stainless Steel Exhaust
  • Suspension - Auto Levelling, ACE - Active Ride (leans into corners)


(0)

Copyright
All original content copyright Matt Arber all rights reserved, no reproduction allowed without written permission.

This website was taken down in 2014, but in 2023 I decided to resurrected it and bring it back online, as it is now over 20 years old, expect bugs and features to no longer work as they once did.

The website is 90GB in size and contains approx 30,000 photos taken by us between 2003-2011, it is hosted at home on an old HP Proliant NAS running Lotus Domino 8.5 and spanning across multiple databases.
Pictures of Holidays
2023 - Esperance WA
2022 - South Australian Coast
2021 - Nowa Nowa, Marlo
2021 - Marlo
2021 - Central Australia
2021 - Apollo Bay
2020 - Warrnambool, Portland
2020 - Mallacoota (Fires)
2018 - Mallacoota
2017 - Wallhalla
2017 - Huggets Crossing
2016 - Mallacoota
2015 - Mallacoota
2015 - Gold Coast
2014 - Mallacoota (again)
2014 - Mallacoota
2014 - Lake Eildon
2013 - Wilsons Prom
2013 - Torquay
2012 - Mitta Mitta
2012 - Mallacoota
2011 - Mallacoota
2011 - Bali, Seminyak
2011 - Mallacoota
2010 - Tasmania
2010 - Mallacoota
2010 - Marlo
2009 - Mallacoota
2009 - Marlo
2009 - Mallacoota
2008 - Marlo
2008 - The Grampians
2008 - Robe SA
2007 - Robe SA
2005 - QLD via the coast
Pictures of Occasions
2011 - Our Wedding
2010 - Jamie & Sarah's Wedding
2010 - Xmas
2009 - Xmas
2008 - Xmas
2007 - Xmas
2006 - Xmas (Mallacoota)
2005 - Xmas
2004 - Xmas